Windows 10 Crashes on Startup? 8 Quick Ways to Fix It
Keep your drivers updated to prevent Windows from crashing
- If your computer crashes before loading, there is a good chance of some hardware issues with your PC.
- Try using Safe Mode to see if you can get into Windows without a problem and check for the most obvious errors like viruses and hard disk errors.
Is your Windows 10 computer crashing when you turn it on? This can make you dread firing up your PC, but you should be able to resolve this error with a little troubleshooting.
In this article, we look at the intricate details of why this happens while offering solutions. Keep reading to find out how to stop these crashes finally.
Why does my PC crash when I turn it on?
When you turn on your computer, you expect it to boot up and be ready. But sometimes, it crashes on startup. What can cause a computer to crash when starting up?
Here are some common reasons why you are experiencing a crash when starting your Windows 10 PC:
- Malware infection – The most common cause of this problem is that your PC may have been infected by malware. If your PC is infected with malware, it can cause all sorts of problems, including crashing when you start up your system.
- Outdated/incompatible drivers – Another possibility is that you might have accidentally installed incompatible or outdated drivers for your hardware devices which are likely to lead to a blue screen.
- Not enough memory – If you have installed a little amount of RAM and then try to run a resource-intensive OS, you will likely experience frequent crashes during startup because Windows cannot allocate enough resources for itself, among other applications and processes.
- Hard drive failure – Hard drives can fail at any time, especially if used for a long time. If your hard drive is damaged or corrupt, it can cause your computer to crash when you turn it on.
- Improperly configured BIOS settings – Changing BIOS settings incorrectly can also cause your PC to crash. Ensure you know what you are doing before attempting changes in BIOS or UEFI firmware settings.
- Overheating system – Excessive temperatures in hardware components is another common reason why PCs crash suddenly.
- Incompatible software – If the problem of your Windows 10 crashing on startup started after installing software, this might be the cause. Some programs don’t augur well with your OS version and instead cause problems.
- Corrupt or damaged file system – If your hard drive has corrupt system files, your PC might crash during bootup because it can’t read the files in those sectors.
How do I fix my computer crash before loading the OS?
Before you begin with the technical solutions, we recommend you try the following first:
- Check for any loose cables and ensure all the connectors are connected properly.
- Disconnect all unnecessary peripherals from your computer.
- Clear unnecessary files from your hard disk drive.
- Remove any CDs or DVDs from their drives.
- Uninstall any suspicious software.
- Make sure that you have backed up all your data.
1. Update your graphics driver
- Depending on how your PC behaves during the crash, you may have to enter into Safe Mode for these steps.
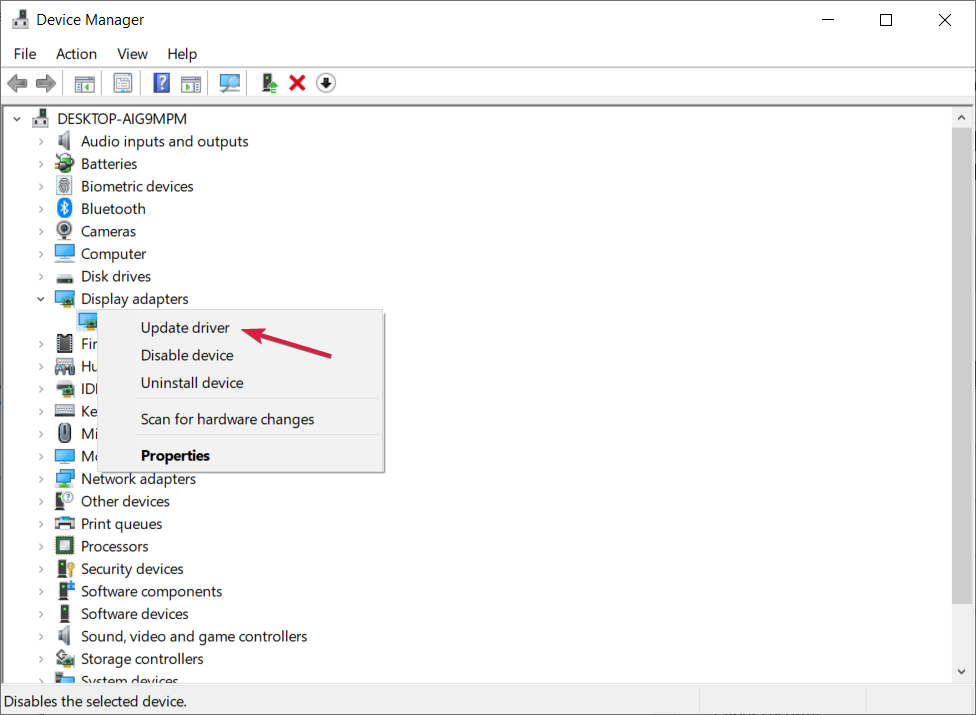
- Go to Search, type device, and open Device Manager.

- You’ll now see the list of all your hardware listed in Device Manager.
- To check for driver updates for your graphic driver, right-click on your graphics card under Display adapters, and choose Update driver from the list of options.

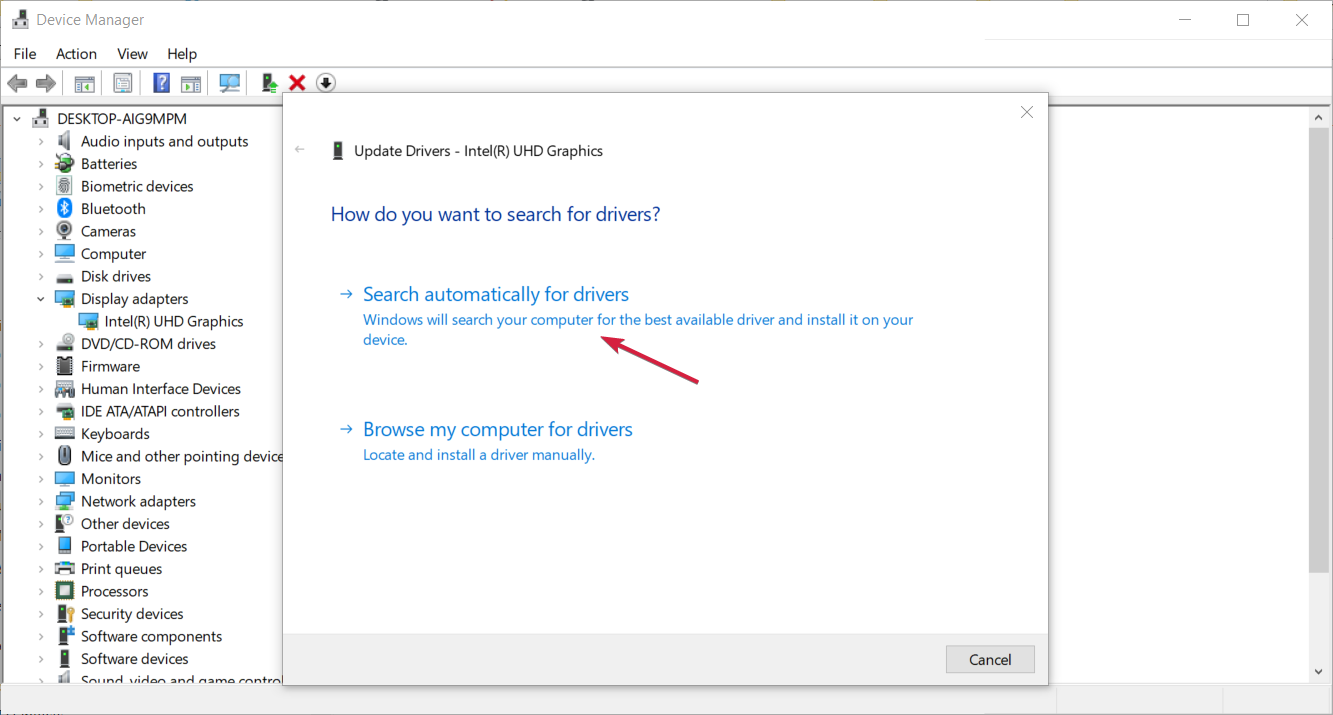
- Now, you will have two choices. You can select the first one if you want the system to search for a driver automatically. The second is for when you already downloaded a driver, so you will have to point to its location.

- If a driver update is available, the wizard will automatically install it, if not, your driver is already up to date.

Still, it’s not unlike Windows to match you with the wrong driver or the driver download to fail. Such scenarios require the reinforcement of an automatic tool capable of scanning and detecting missing or outdated drivers and then installing them for you.
- Download and install DriverFix.
- Launch the software.
- Wait for DriverFix to detect all your faulty drivers.
- The application will now show you all the drivers that have issues, and you just need to select the ones you’d liked fixed.
- Wait for the app to download and install the newest drivers.
- Restart your PC for the changes to take effect.

DriverFix
Keep you GPU on the peaks of their performance without worrying about its drivers.2. Scan the PC for malware
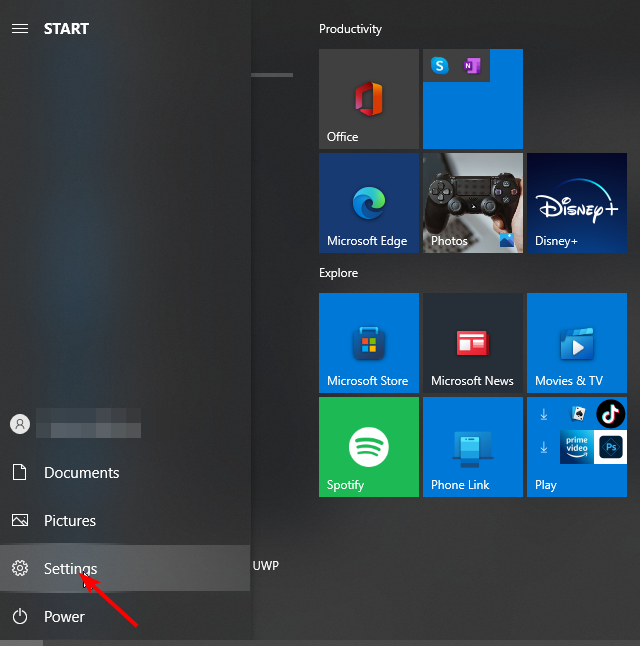
- Hit the Start Menu icon and click on Settings.

- Click on Windows Security then select Open Windows Security.

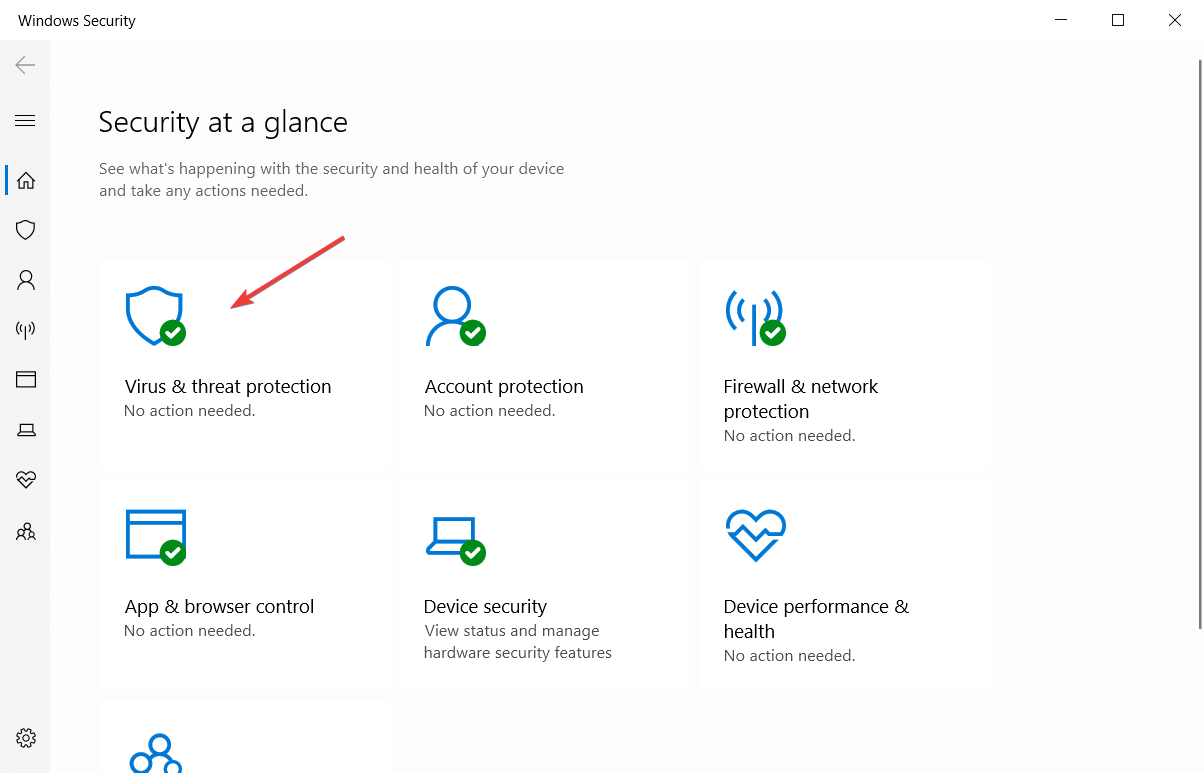
- Now, click on Virus & threat protection here.

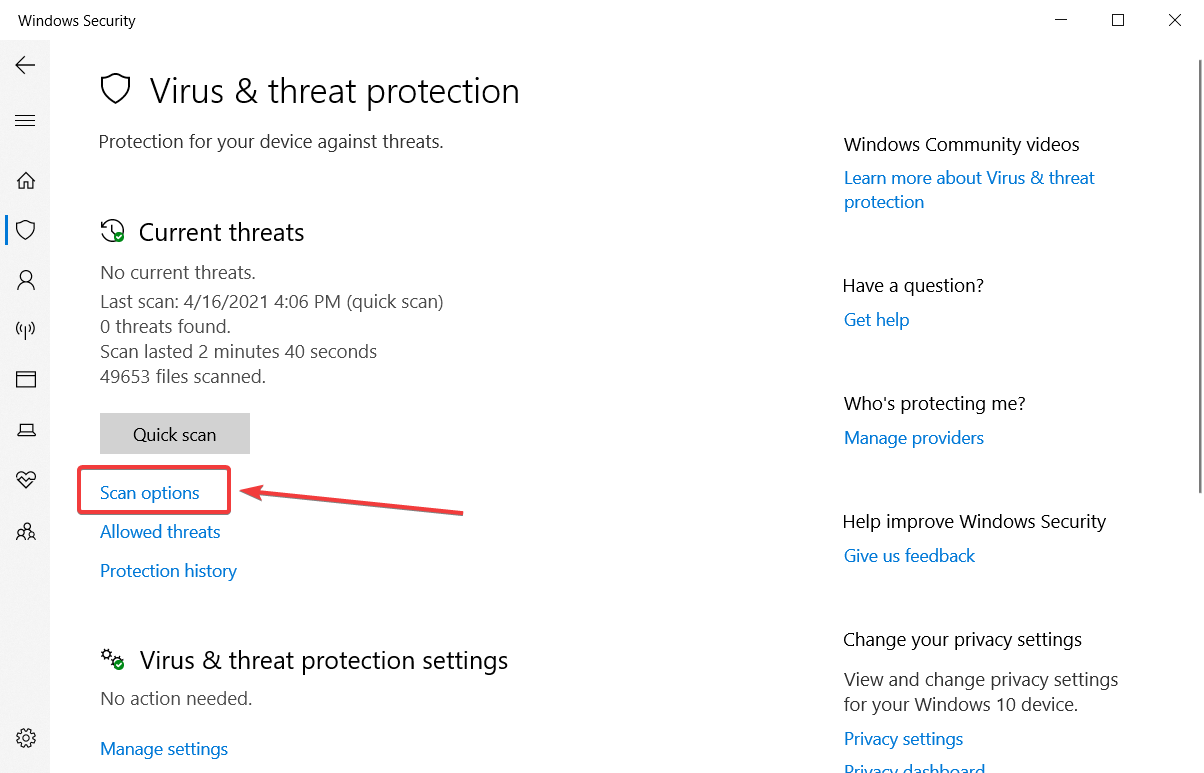
- Click on Scan options.
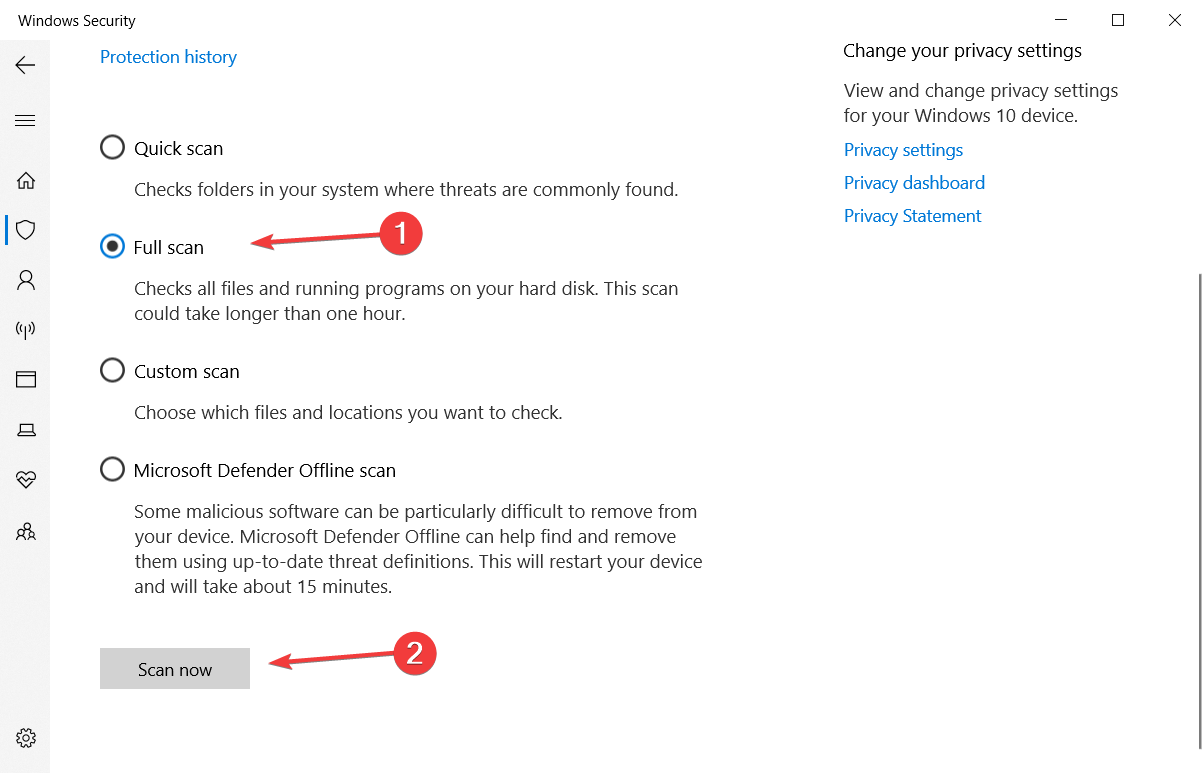
- Now, select Full scan and click on the Scan now button at the bottom.

Even with a thorough scan, Windows Defender is sometimes not enough to fish out all those viruses lurking in your system.
You will need a more comprehensive antivirus solution, such as ESET NOD32, that has a high detection rate and advanced protection technology to keep your PC safe all the time.
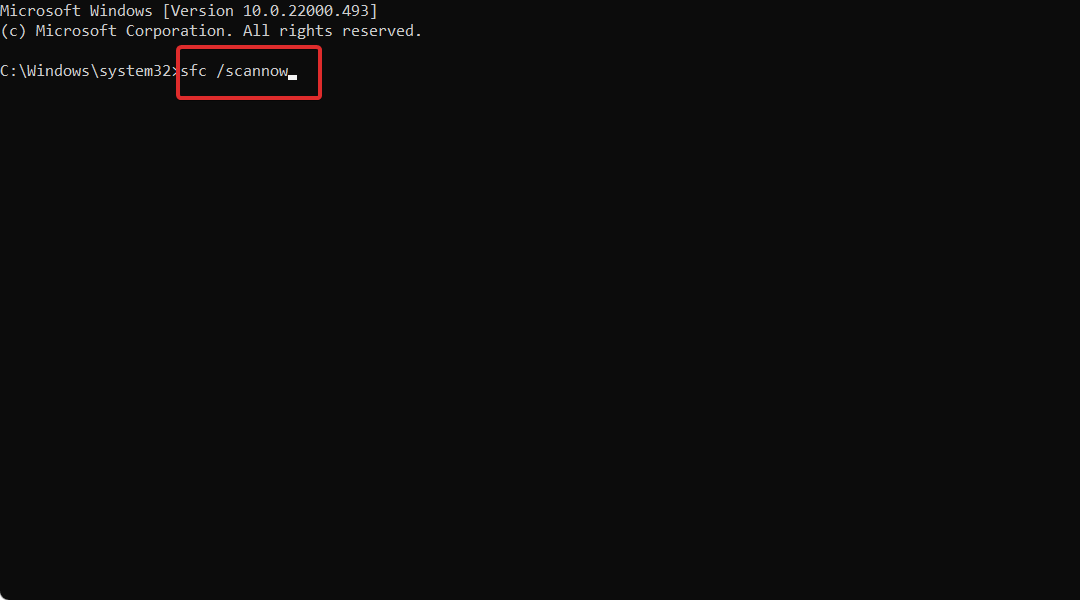
3. Run the System File Checker scan
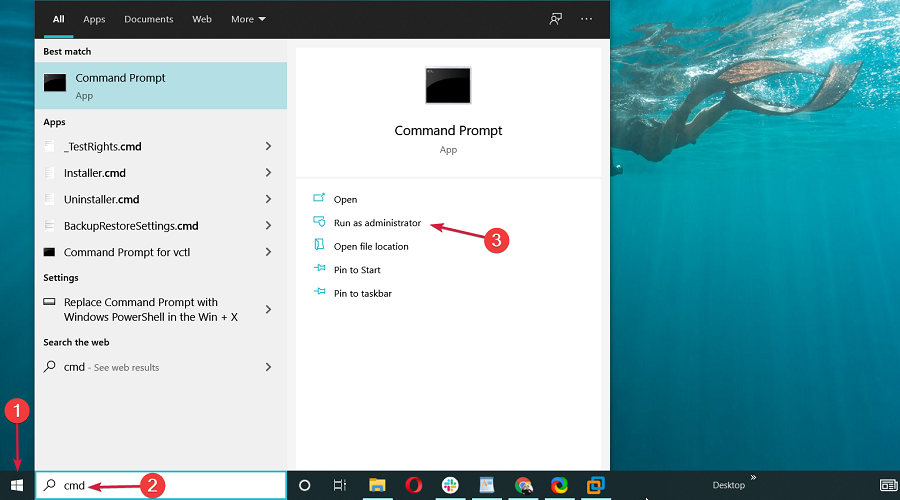
- Press the Windows key, then type cmd and select the Run as administrator option.

- Next, type or paste the following command and press Enter to run it:
sfc /scannow
4. Run a Check Disk scan
- Press the Windows key, then type cmd and select the Run as administrator option.
- Type in the following command and hit Enter. Remember to replace F with your corresponding hard drive letter:
CHKDSK /f /r
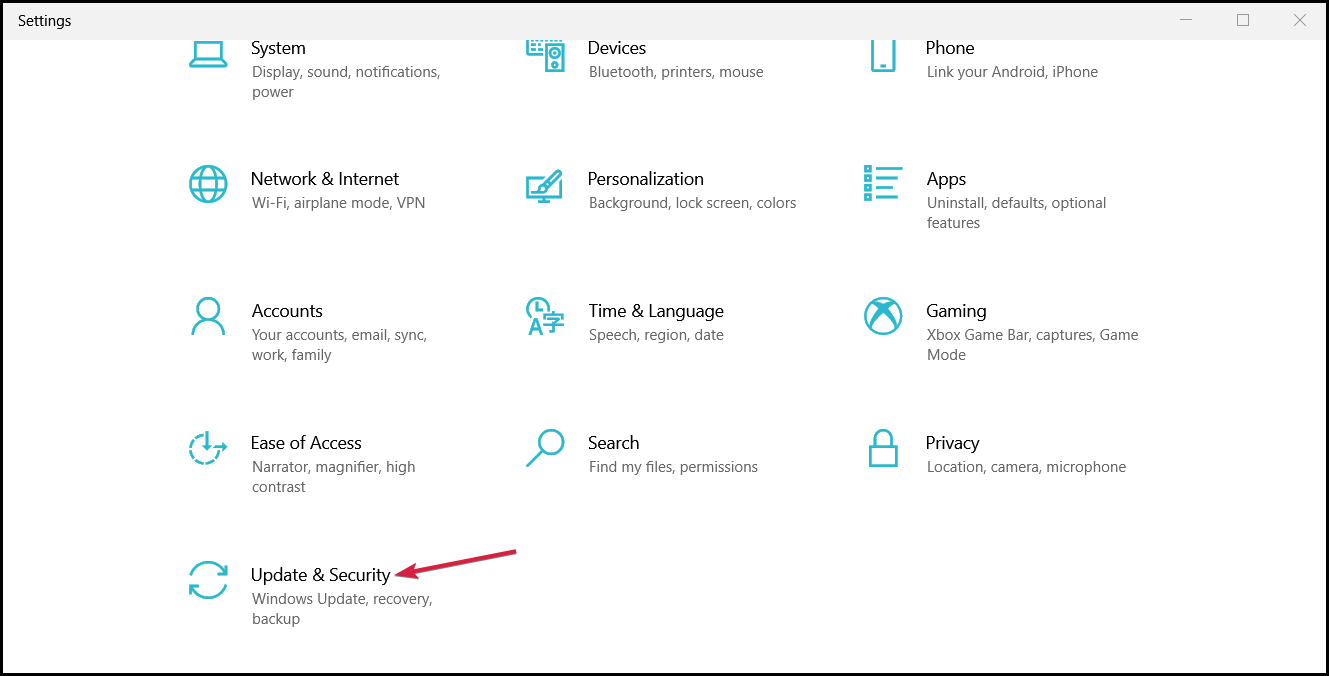
5. Check for Windows updates
- Press Windows + I to open the Settings app, then click on Update & Security.

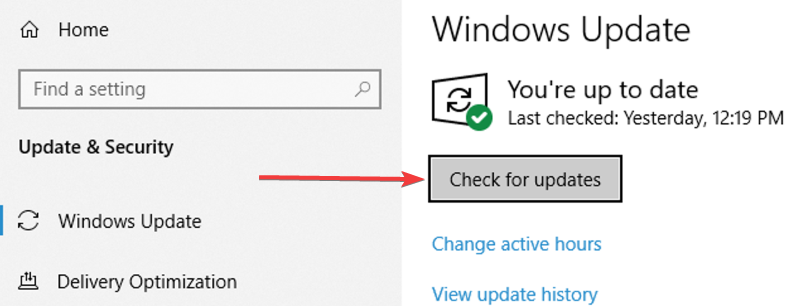
- Click the Check for updates button to find any new OS updates and install them.

6. Update your BIOS
- Download the newest BIOS version from your motherboard manufacturer’s website and copy it onto a USB flash drive.
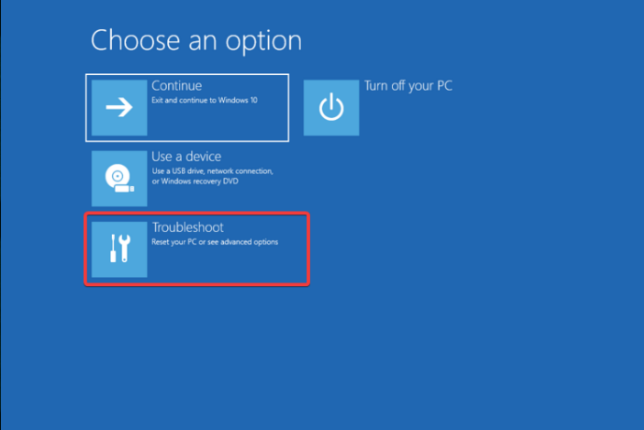
- Open the Start Menu, click the Power button while holding the Shift key, and choose the Restart option.
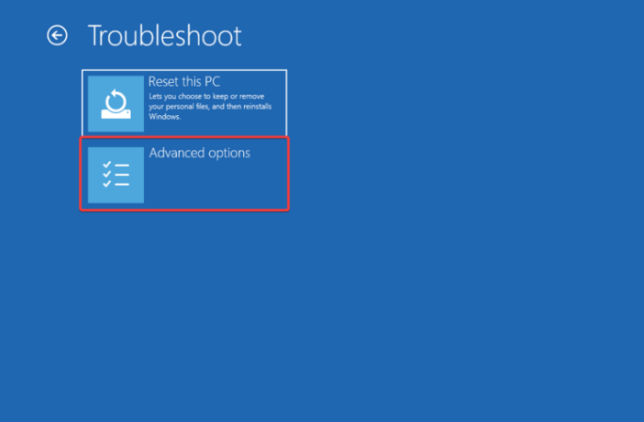
- You should see several options available. Choose Troubleshoot.

- Now select Advanced options.

- Click on UEFI Firmware Settings.

- Click the Restart button, and your computer should now boot to BIOS.
- Once you enter BIOS, look for the BIOS update option and select it.
- Now you need to choose the BIOS update file from your USB flash drive and wait while your BIOS updates.

7. Reset your System Restore points
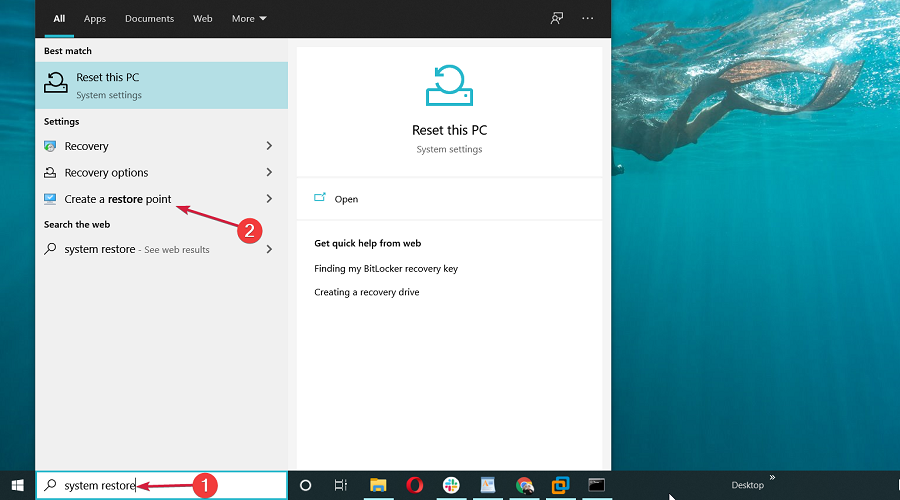
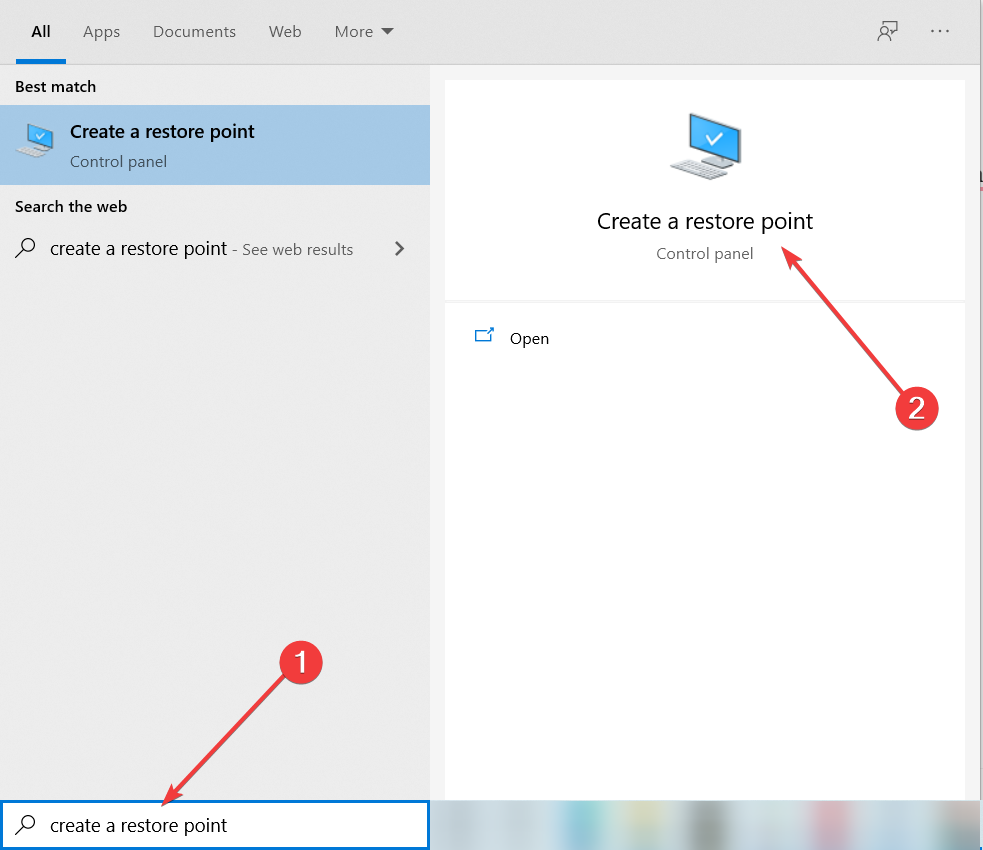
- Press Windows Key + S, type create a restore point, and select the option from the results.
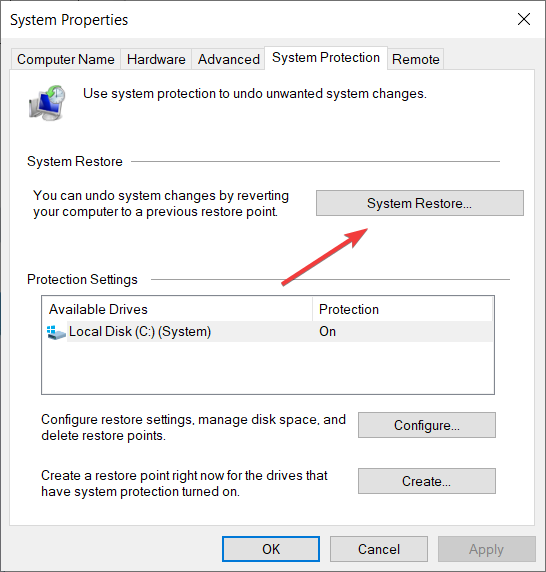
- Click on the System Restore button.

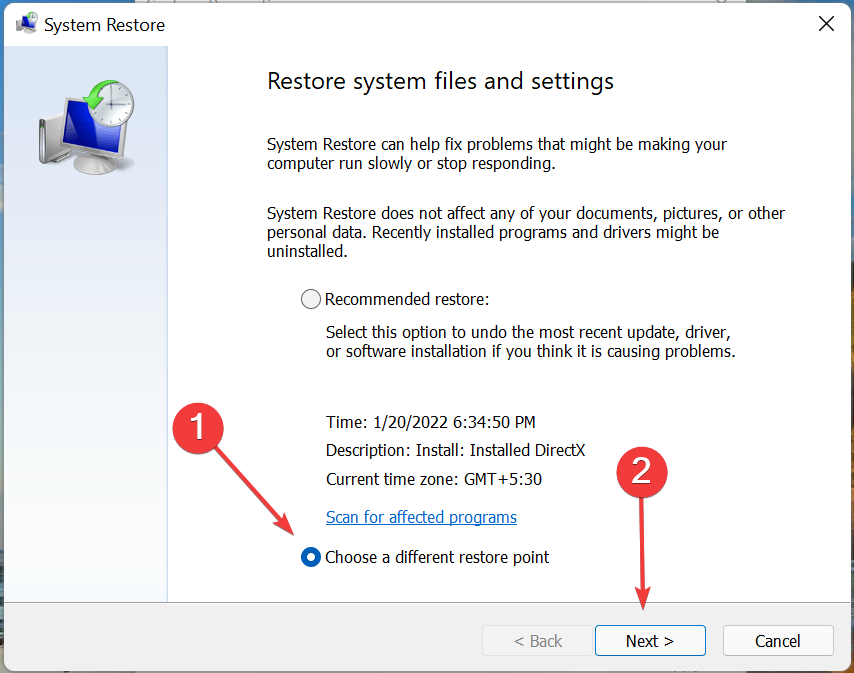
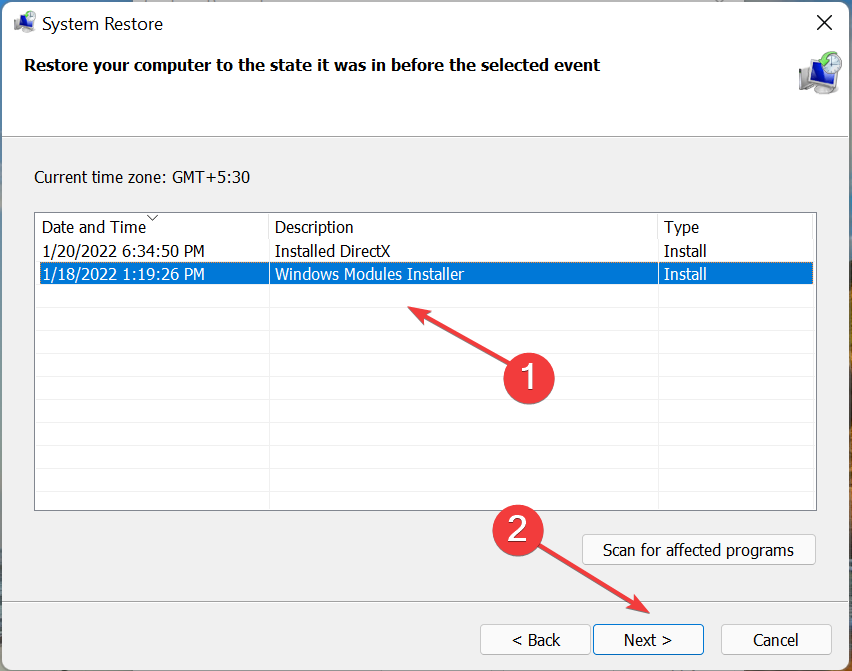
- You will be recommended the latest restore point, but you can click on Choose a different restore point and hit the Next button to select a previously created one.

- Select the desired restore point and click Next.

8. Reset your PC
- Click on the Windows button and select Settings.
- Select Update & Security.
- Click on Recovery on the left pane, then under Reset this PC, click Get started.

- Select the Remove everything option.

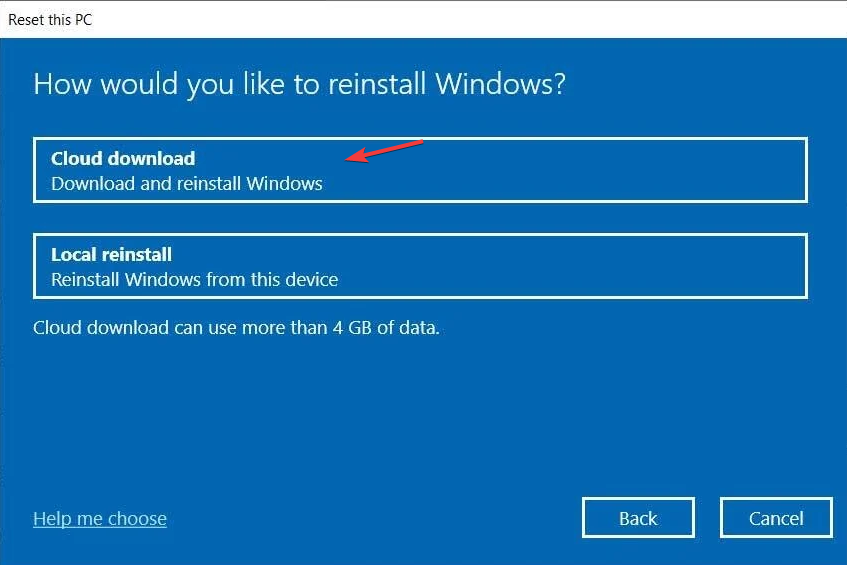
- Choose a Cloud download or Local reinstall.

- Click Reset and wait for the process to complete.


If you’ve tried all the steps mentioned above but are still at an impasse, it may be time to perform a clean install of Windows or upgrade to Windows 11.
Hopefully, you’ve been able to solve the issue of Windows 10 crashing on startup. Also, check out what to do when games keep crashing in Windows 10.
For any feedback, leave a comment down below.
Still experiencing issues?
SPONSORED
If the above suggestions have not solved your problem, your computer may experience more severe Windows troubles. We suggest choosing an all-in-one solution like Fortect to fix problems efficiently. After installation, just click the View&Fix button and then press Start Repair.