Recycle Bin is Greyed Out? How to Quickly Fix it
Reconfigure the Local Group Policy Editor when you face this problem
- Corrupted Recycle Bin and other issues can cause the problem to appear on your PC.
- Tweak the Windows Registry Editor and Local Group Policy in order to fix this issue.

An issue Windows users complain about is that the Recycle Bin is grayed out. It prevents users from accessing the recycle bin, restoring deleted files, and accessing the Recycle Bin settings. However, this article will discuss what causes the issue and ways to fix it.
Likewise, you can go through our guide about what to do if the Recycle Bin goes missing in Windows 11.
Why is the Recycle Bin greyed out?
Many factors can cause the Recycle Bin to be greyed out on your computer. Some notable ones are below:
- User account permission issues – The Recycle Bin activities like opening, emptying, restoring, etc., can sometimes require administrative rights because it is a part of system alterations. So, the option can be greyed out and inaccessible if you’re not running an account with administrator privileges.
- Corrupted Recycle Bin – You can also encounter the issue when the Recycle Bin is corrupted or compromised by malware and virus attacks or other malicious activities. It affects its functionality and can cause it to malfunction. Read more about fixing corrupt Recycle Bin in Windows 11.
These causes may differ on various devices. Nonetheless, you can fix the problem by trying the steps to be discussed in the next section.
What can I do if the Recycle Bin is greyed out?
Observe the following preliminary checks before proceeding with any advanced troubleshooting steps:
- Restart your computer – Restarting the PC is the quickest way to fix temporary performance issues and refresh its components.
- Perform a clean boot – A clean boot will boot the PC with minimal drivers and programs, preventing the interference of a third-party program that can cause the computer to malfunction.
- Empty the Recycle Bin for all users – It will delete the corrupt files or folders, causing the Recycle Bin to grey out. You can check our guide for steps to empty the Recycle Bin for all users on Windows 11.
- Fix corrupted Recycle Bin – Fixing the Recycle Bin if it is corrupt will resolve any problems with the Windows component. Read about how you can fix the corrupt Recycle Bin on your PC.
If you can get around the problem, go ahead with the fixes outlined below:
1. Re-add the Recycle Bin icon
- Press Windows + I key to open Windows Settings.
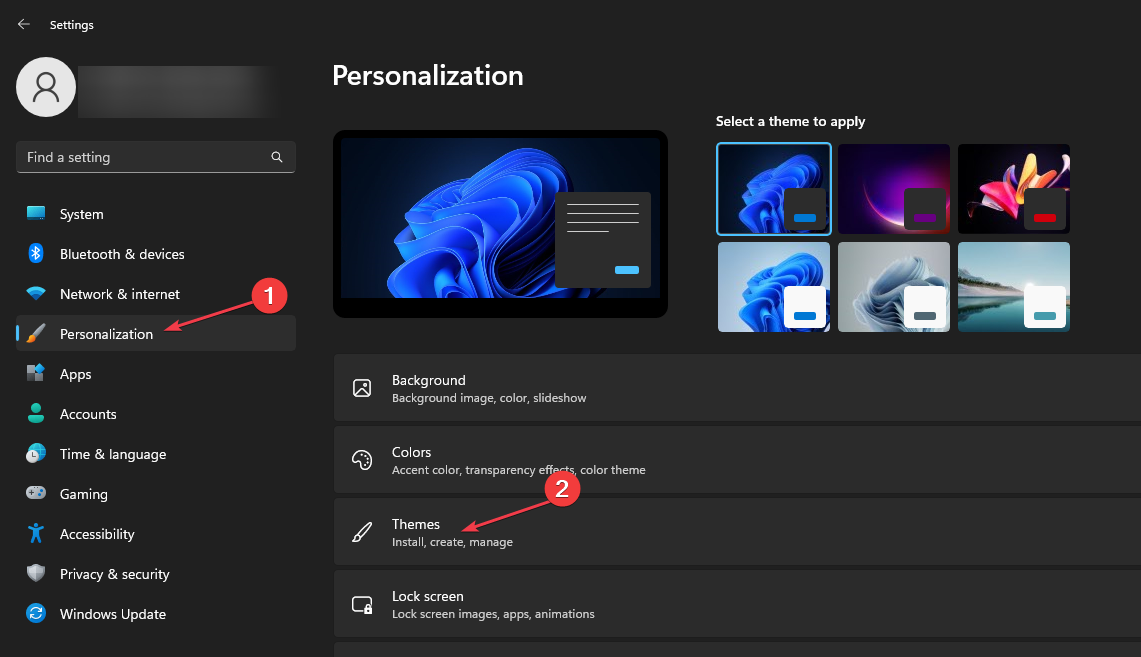
- Select the Personalization option and select Themes.

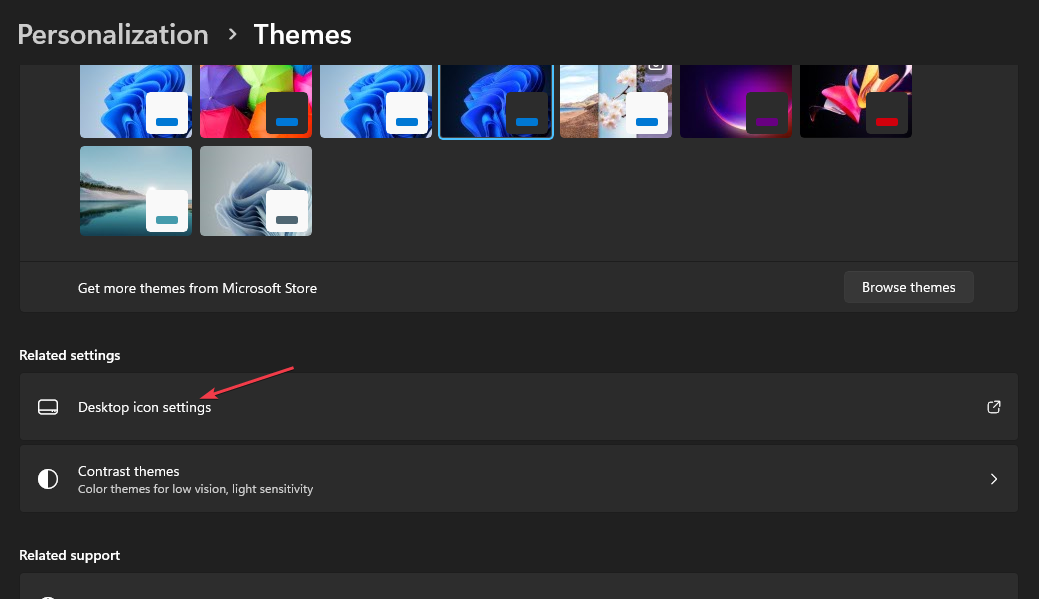
- Then, click the Desktop icon settings in the right pane.

- Now, uncheck the box for Recycle Bin and click OK to apply your changes.

- Repeat steps 1 to 4 and check the box for Recycle Bin, then click OK to apply your changes.

Re-adding the Recycle Bin icon will help trigger it to come up.
2. Use the Group Policy Editor
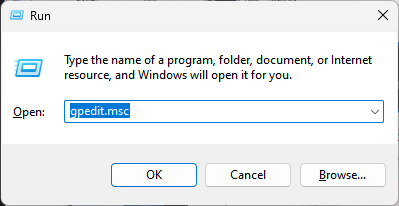
- Press Windows + R key to open the Run dialog box, type gpedit.msc in the text box, and press Enter to open Local Group Policy Editor.

- Now, navigate to this location:
User Configuration\Administrative Templates\Desktop - In the right pane of the screen, find Remove Recycle Bin icon from the desktop file. Double-click on the file to open it, and click the radio button for the Not Configured option.

- Then, click the OK button to save your settings.

- Restart the computer.
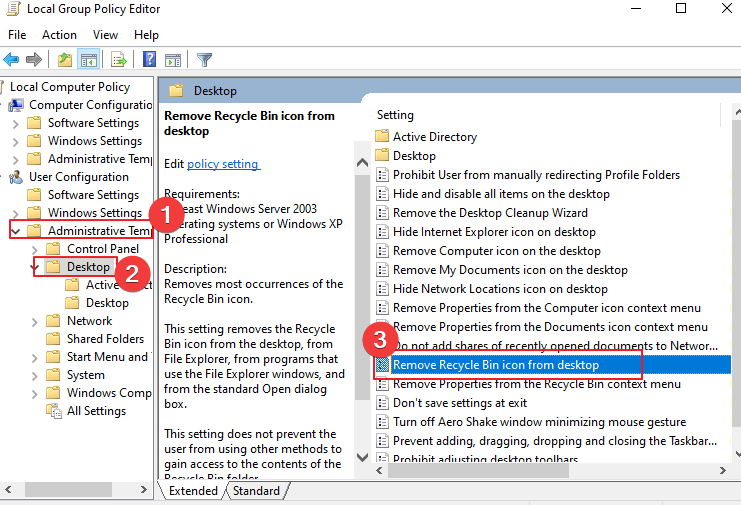
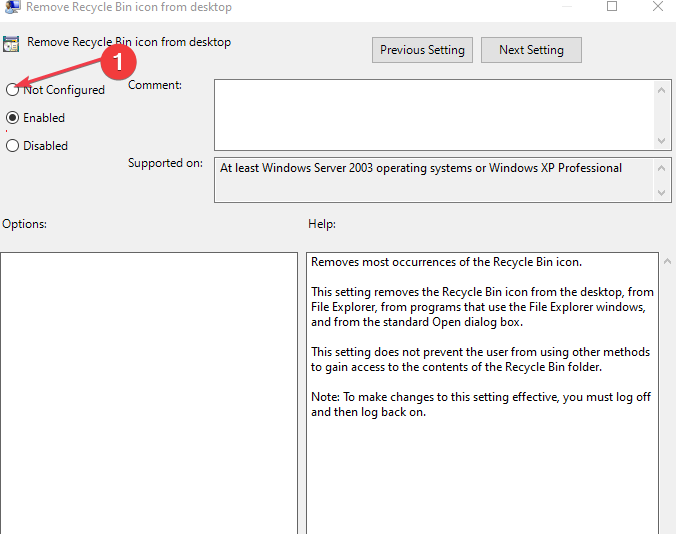
The above steps allow you to configure and modify the option for removing the Recycle Bin icon from the desktop and restoring it.
After doing that, check if Recycle Bin is still grayed out.
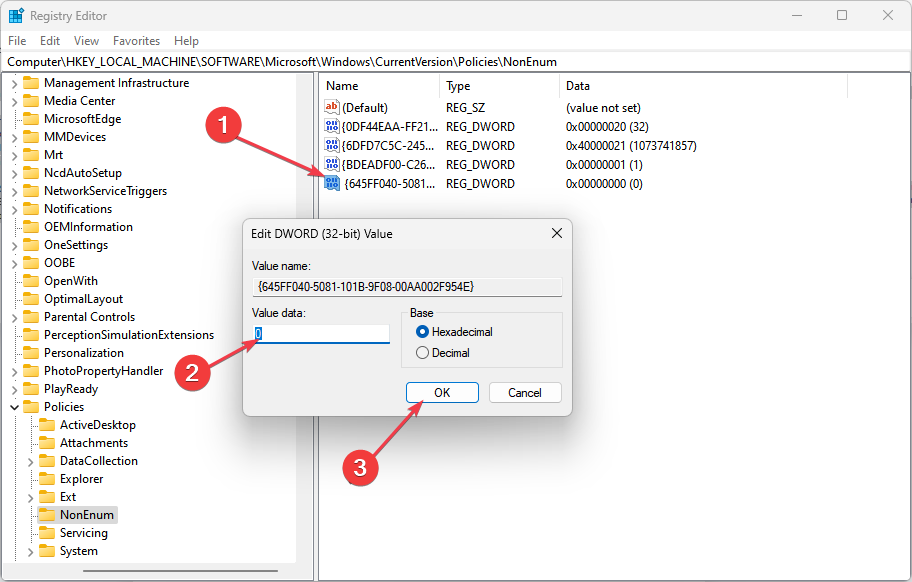
3. Use the Registry Editor
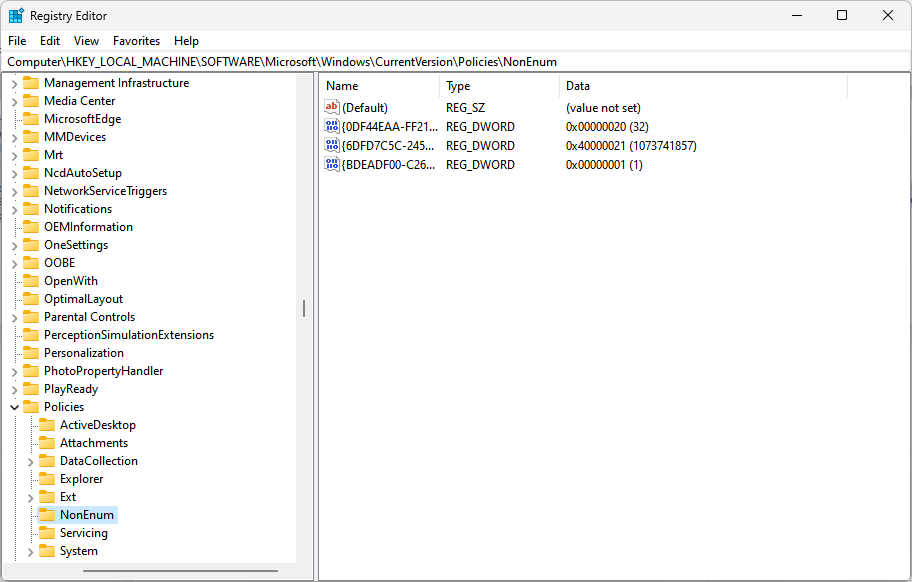
- Press Windows + R key to open the Run dialog box, type regedit in the text box, and press Enter to open Registry Editor.
- Copy and paste the following location to the address bar and press Enter:
Computer\HKEY_LOCAL_MACHINE\SOFTWARE\Microsoft\Windows\CurrentVersion\Policies\NonEnum
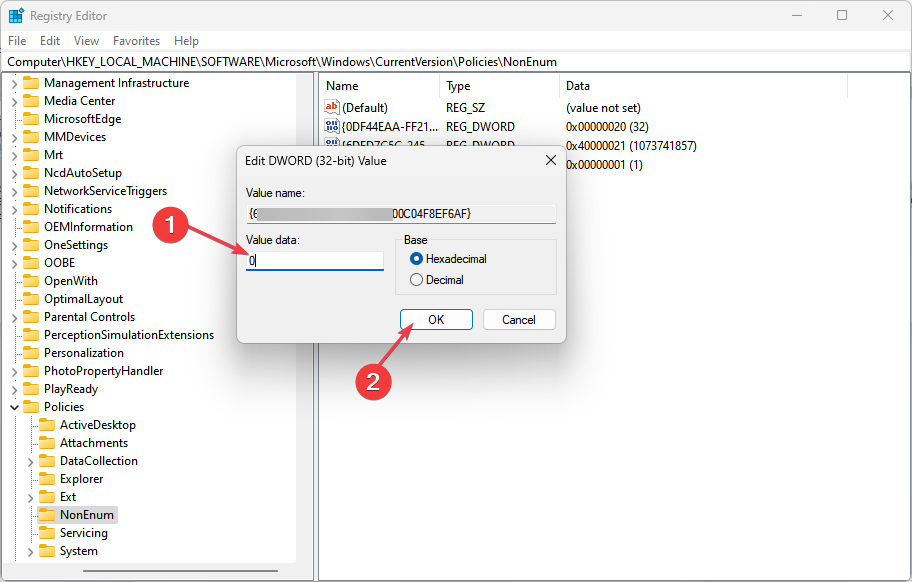
- Then, double-click the DWORD value named {645FF040-5081-101B-9F08-00AA002F954E} in the right pane and set its value data to 0.
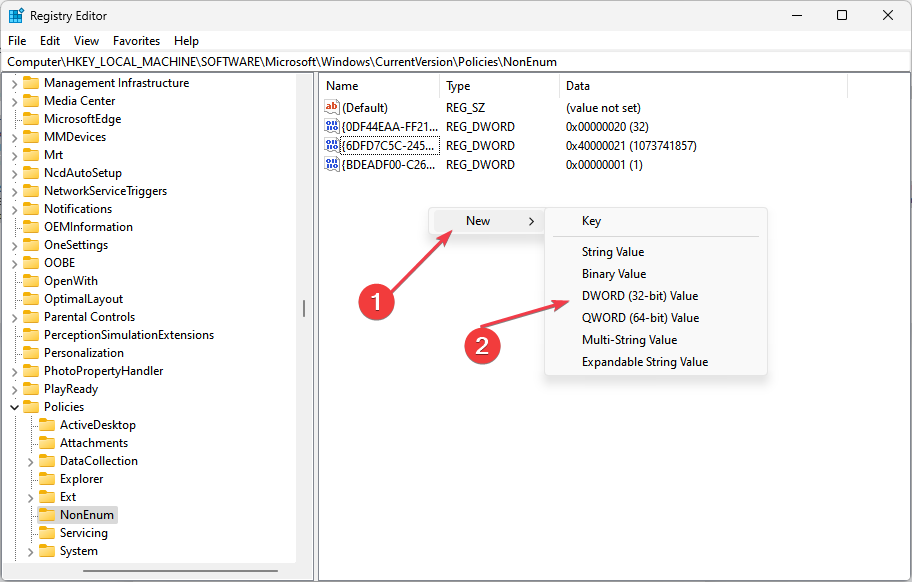
- If you can find the above value, right-click any blank area in the right pane and select New from the drop-down, then DWORD (32-bit) Value.
- Now, input {645FF040-5081-101B-9F08-00AA002F954E} as the file name.
- Double-click on the DWORD value and set its value data to 0. Click the OK button to save your changes.
Tweaking the above registry will hopefully fix Recycle Bin is grayed out issue on your PC.
Conclusively, you may be interested in our guide on how to fix Recycle Bin icons not refreshing on Windows 11.
Also, read about deleted files not being in the Recycle Bin on Windows 11 and how to fix the problem.
If you have further questions or suggestions, kindly drop them in the comments section below.
Still having issues? Fix them with this tool:
SPONSORED
If the advices above haven't solved your issue, your PC may experience deeper Windows problems. We recommend downloading this PC Repair tool (rated Great on TrustPilot.com) to easily address them. After installation, simply click the Start Scan button and then press on Repair All.