How to set up a Dev Drive on Windows 11
The feature is coming to the Preview channel real soon.
- Microsoft announced plans to launch the Dev Drive feature on Windows 11 to Preview.
- The tool allows you to deal with repositories with a new storage volume, special for devs.
- Here's how you can manage to do so.
As a developer, dealing with repositories containing thousands of files and directories can be challenging, especially when it comes to heavy I/O operations like builds. Fortunately, here comes the good news: Microsoft introduces a new storage volume feature set called Dev Drive, specifically designed for developers, offering enhanced performance and security on Windows 11.
As noted from the Redmond-based tech giant’s blog post, your system needs to run on Windows 11 and have sufficient available storage. Dev Drive should also not be used to store developer tools like Visual Studio, MSBuild, .NET SDK, Windows SDK, etc. These tools should be stored on your main C:\ drive.
Nevertheless, Microsoft has announced that this feature will be available in the Preview channel within this week, indicating that it may take some more time before it becomes widely accessible to the general public. We’ll keep you updated as we go.
And, as spotted by Windows insider @PhantomOfEarth, if you have the For developers setting opted in, you will see all your Dev Drives within the Settings app.
If you’re still curious about how it will work, we’ll walk you through the process of setting up a Dev Drive to supercharge your development workflow.
How to set up a Dev Drive on Windows 11
1. Click on the Start menu and select the gear icon to open the Windows Settings window.
2. In the Windows Settings window, click on the System category and choose Storage from the left-hand sidebar
3. Click on Advanced Store Settings under the Storage section.
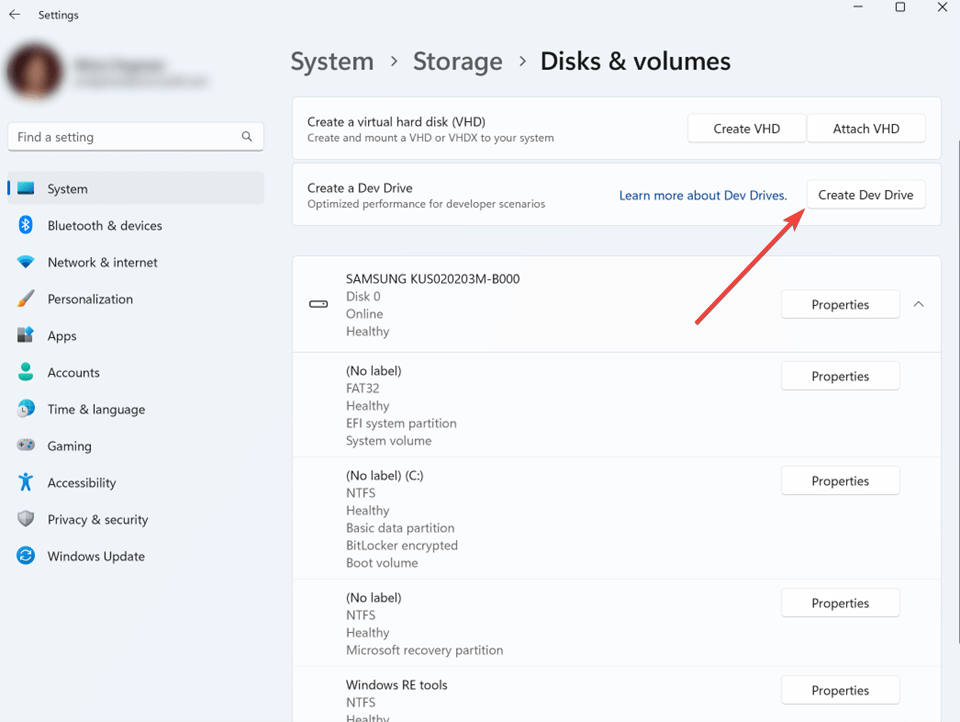
4. Within the Advanced Store Settings, locate and click on the Disks & Volumes option to open the configuration settings for your system’s disks and volumes.
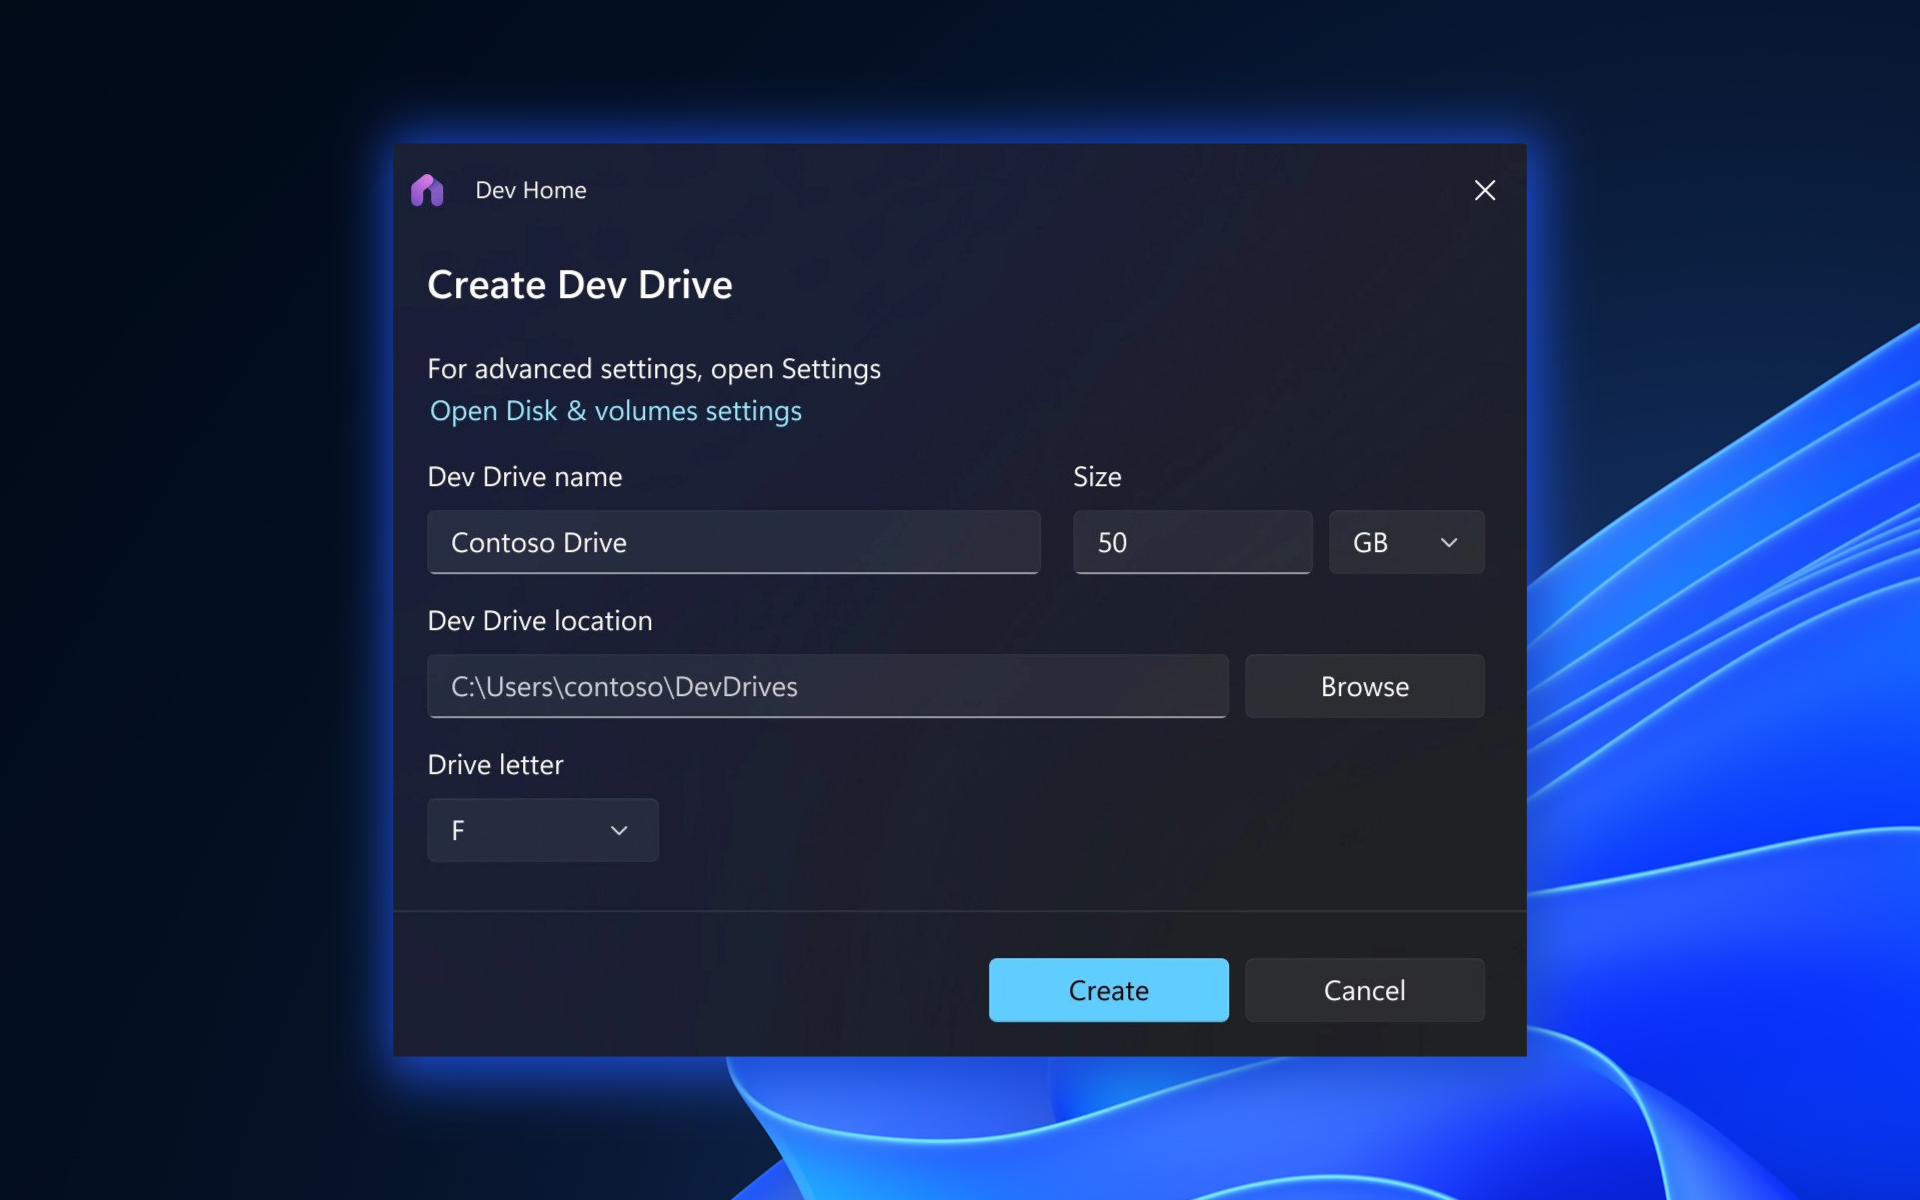
4 In the Disks & Volumes settings, click on the Create dev drive option.
5. A setup wizard will guide you through creating your Dev Drive. Choose the appropriate size and follow the wizard’s instructions.
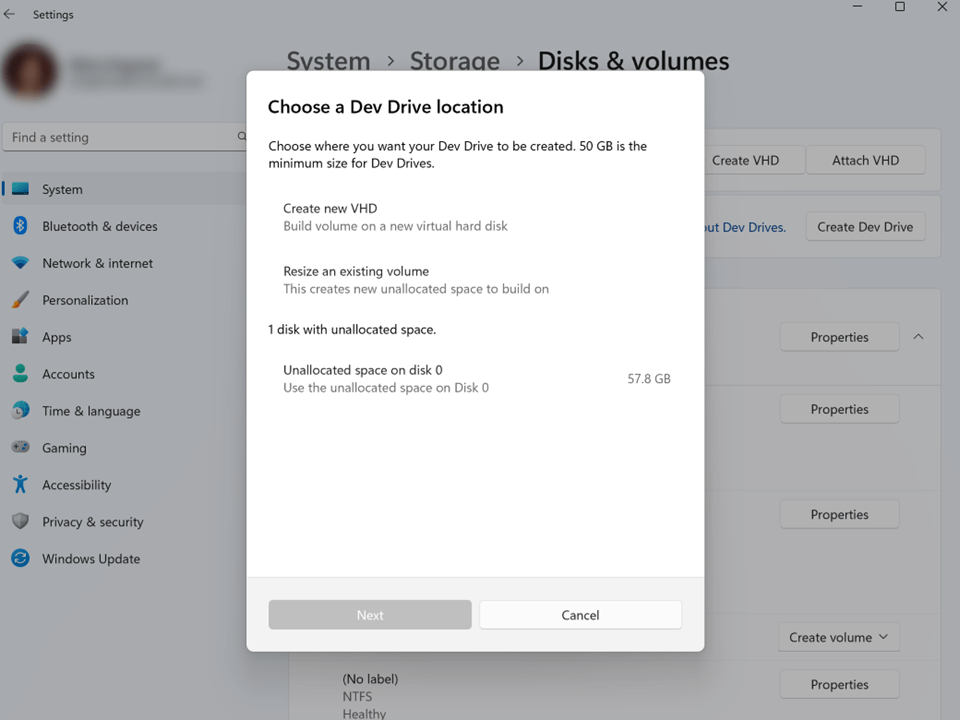
6. After specifying the size of your Dev Drive, follow the remaining instructions provided by the setup wizard to finalize the creation.
With the introduction of Dev Drive on Windows 11, developers now have a specialized storage volume to enhance their productivity. And, if you’re a developer who’s on the market for some good browsers, we’ve also got you covered.
What do you think about the introduction of Dev Drive on Windows 11? Let us know in the comments!
Still having issues? Fix them with this tool:
SPONSORED
If the advices above haven't solved your issue, your PC may experience deeper Windows problems. We recommend downloading this PC Repair tool (rated Great on TrustPilot.com) to easily address them. After installation, simply click the Start Scan button and then press on Repair All.