WRkrn.sys Blue Screen: How to Fix This System Error
A Webroot app update is efficient for many users
- WRkrn.sys is a driver used by Webroot SecureAnywhere and manages the software's kernel-mode components.
- If the driver triggers a BSoD, you may reset your computer as a last resort.
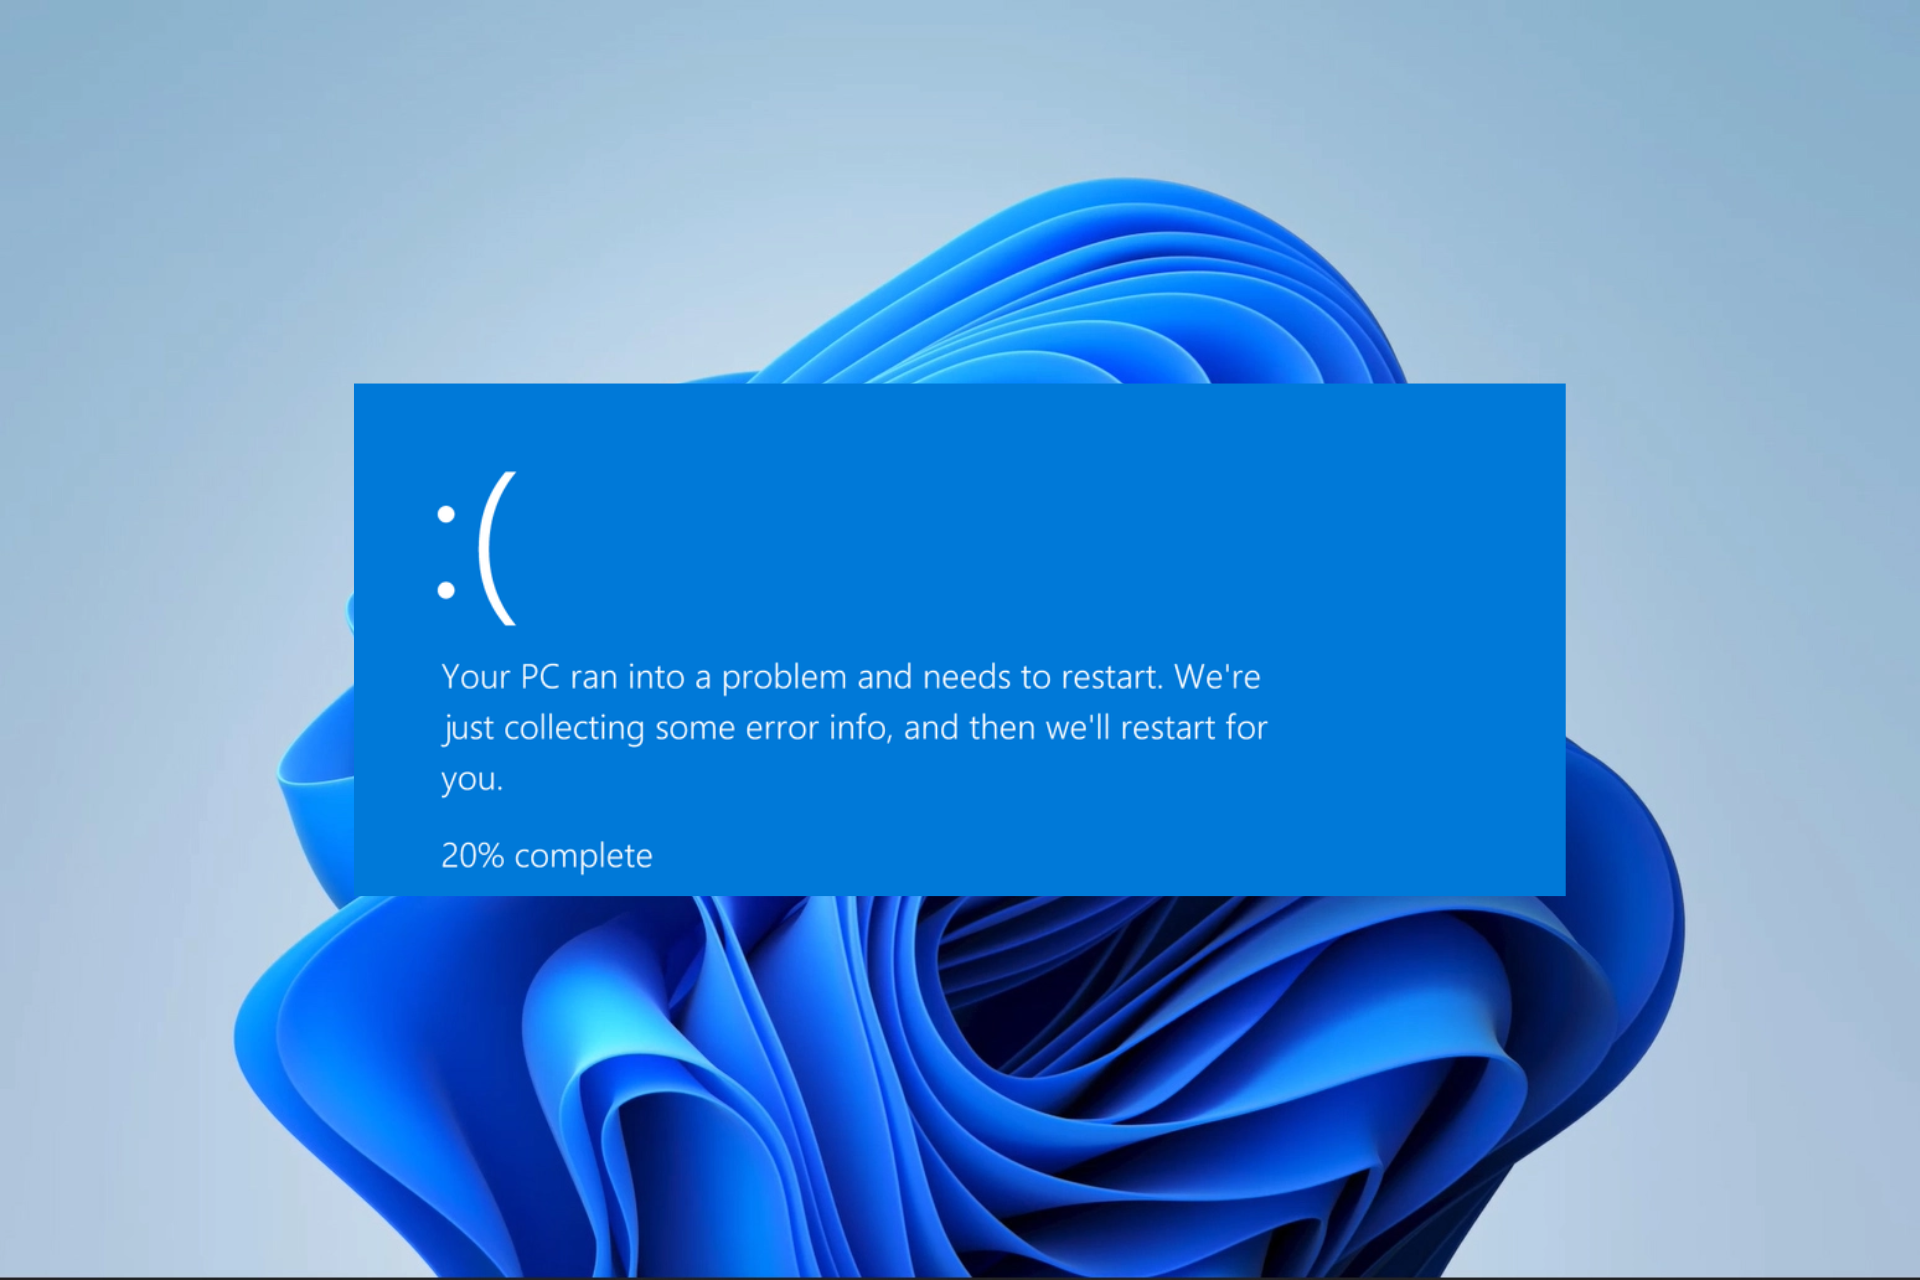
The WRkrn.sys driver is a kernel-mode driver used by Webroot SecureAnywhere, and it may sometimes trigger a Blue Screen of Death (BSoD) error.
However, the fixes are not always complicated. So, in this guide, we have put together some easy-to-follow steps to rid your computer of the blue screen error.
What causes the WRkrn.sys BSoD?
The error can be caused by a variety of factors, including any of the following:
- Corrupted or outdated WRkrn.sys – Outdated drivers are the main culprits for BSoD errors like the one caused by WRkrn.sys.
- Conflict with another driver – There are chances that the WRkrn.sys driver is conflicting with other drivers on your computer.
- Hardware problem – If your computer’s hardware is not working properly, it can cause the driver to fail and trigger the stop code.
- An outdated antivirus – If you use an outdated version of the Webroot antivirus, chances are that associated drivers are outdated and will trigger this issue.
With these causes in mind, we can now start applying the right solutions to fix the issue.
How do I fix a wrkrn.sys BSoD?
Before exploring any complex fixes, we recommend you do the following:
- Run a virus scan to ascertain the BSoD is not triggered by malware within your computer.
- Restart your computer, as this may be strong enough to end some problematic processes that may cause the BSoD.
- Uninstall conflicting apps which in most cases will be other third-party antivirus programs.
However, if the above workarounds do not work, please proceed to more detailed solutions below.
1. Reinstall the Webroot antivirus
 NOTE
NOTE
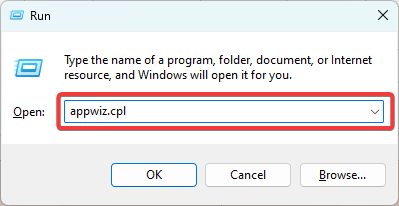
- Press Windows + R to open the Run dialog.
- Type apwiz.cpl and hit Enter.

- Click on the Webroot antivirus from the app list and select the Uninstall button.

- Follow the wizard to complete the process, navigate to the official website to get a new copy, and install it.

Our readers reported that reinstalling their Webtroot antivirus fixed the issue so if you’re in the same situation, use the solution above.
Note that on rare occasions, you may need to boot into Safe Mode to execute the uninstallation.
2. Rename the WRkrn.sys file
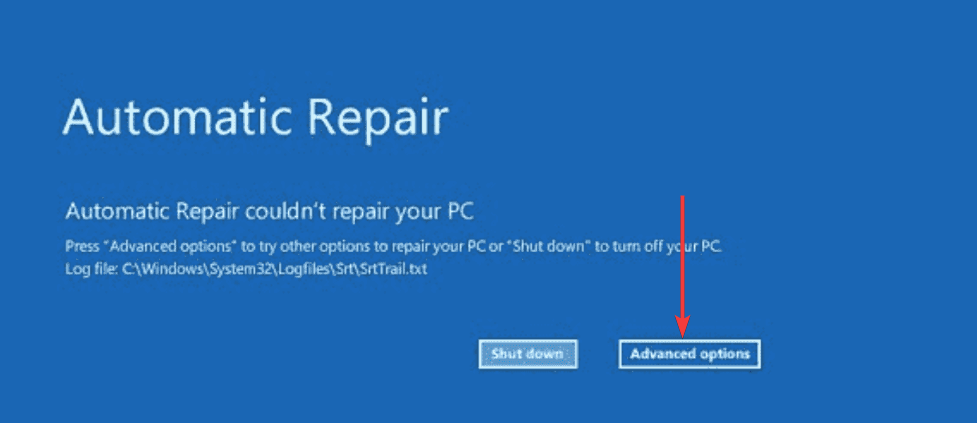
- Press the Power button to start the computer, and once you see the Windows logo, press and hold the Power button to shut down. Repeat this step a few times till you are redirected to the Automatic Repair screen.
- There, you have to click on the Advanced options.

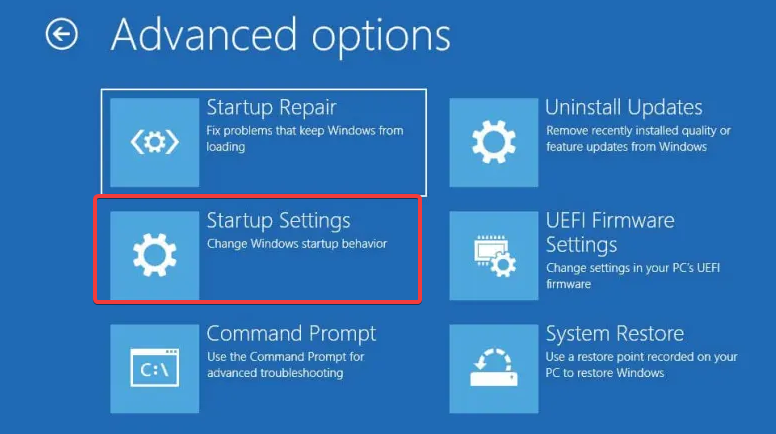
- Choose Troubleshoot, then click on the Advanced options.

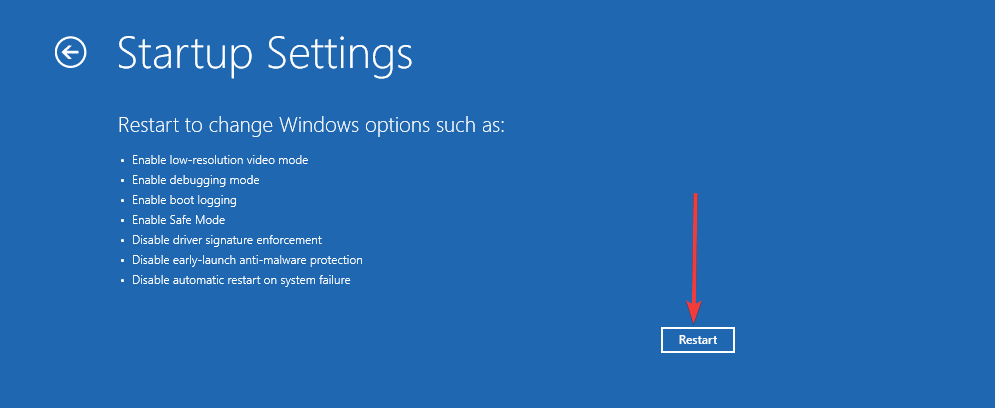
- Click on Startup Settings.

- Click on the Restart button.

- Press the F4 key to get into the Safe Mode.
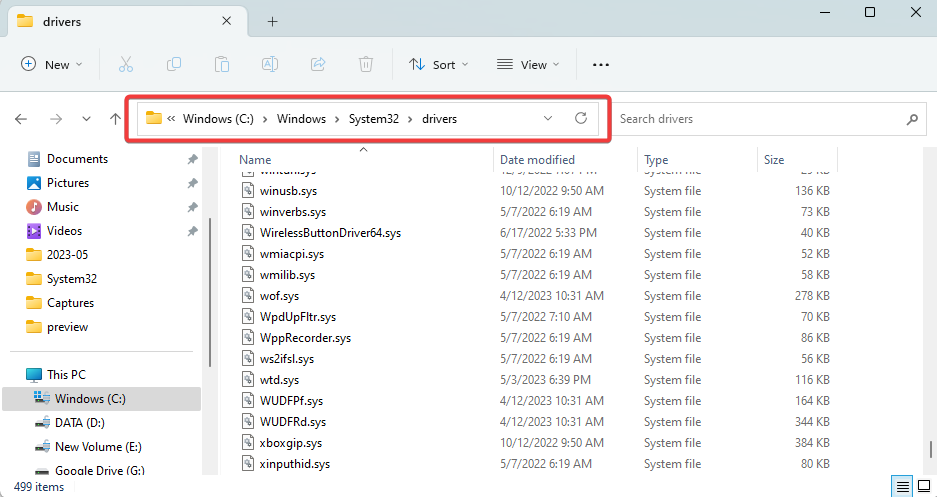
- Navigate to the path below:
C:\Windows\System32\drivers
- Search for WRkrn.sys and rename it to WRkrn.sys.old.
- Finally, reinstall the app like in Solution 1.

3. Reset the PC
NOTE
- Boot into Safe Mode using steps 1 to 6 of Solution 2.
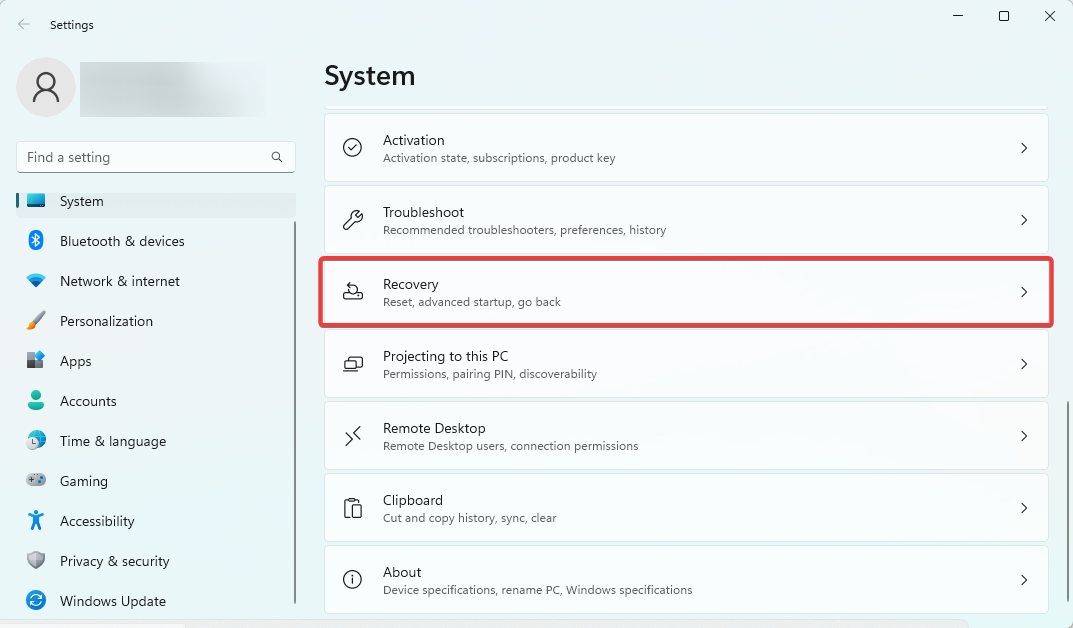
- Press Window + I to open the Settings app.
- On the right pane, click on Recovery.

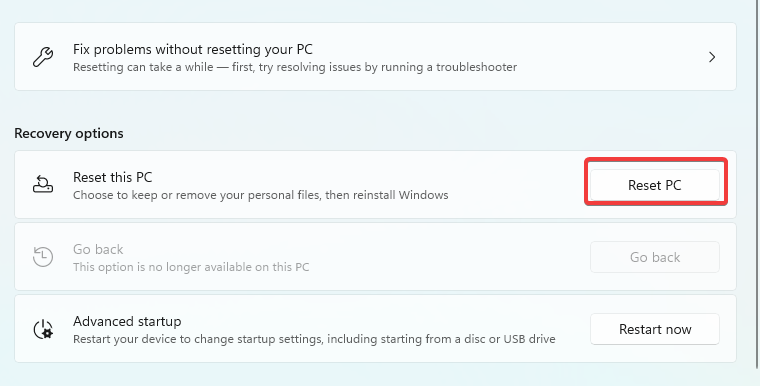
- Click the Reset this PC option.

- Select Keep my files to save as much as possible from the old installation (If the problem persists after a reset, you may redo the process but select Remove everything rather).

- Follow the onscreen prompts to complete the process.

If you have tried the above steps and are still getting the WRkrn.sys blue screen error, you may need to contact Webroot support for assistance.
That is all we will cover in our guide. While we have not written these solutions in any particular order, we recommend trying a reset as a last resort since you may lose all your data.
Please reach out to us using the comments section below and let us know what worked for you.
Still experiencing issues?
SPONSORED
If the above suggestions have not solved your problem, your computer may experience more severe Windows troubles. We suggest choosing an all-in-one solution like Fortect to fix problems efficiently. After installation, just click the View&Fix button and then press Start Repair.